Transfer data to AWS IoT using the MQTTs protocol#
Note
Only applicable to Barcode Readers that support Wi-Fi transmission, such as DS2800.
Register the device on the AWS IoT page and obtain the client certificate and private key#
Click Things to enter the page.
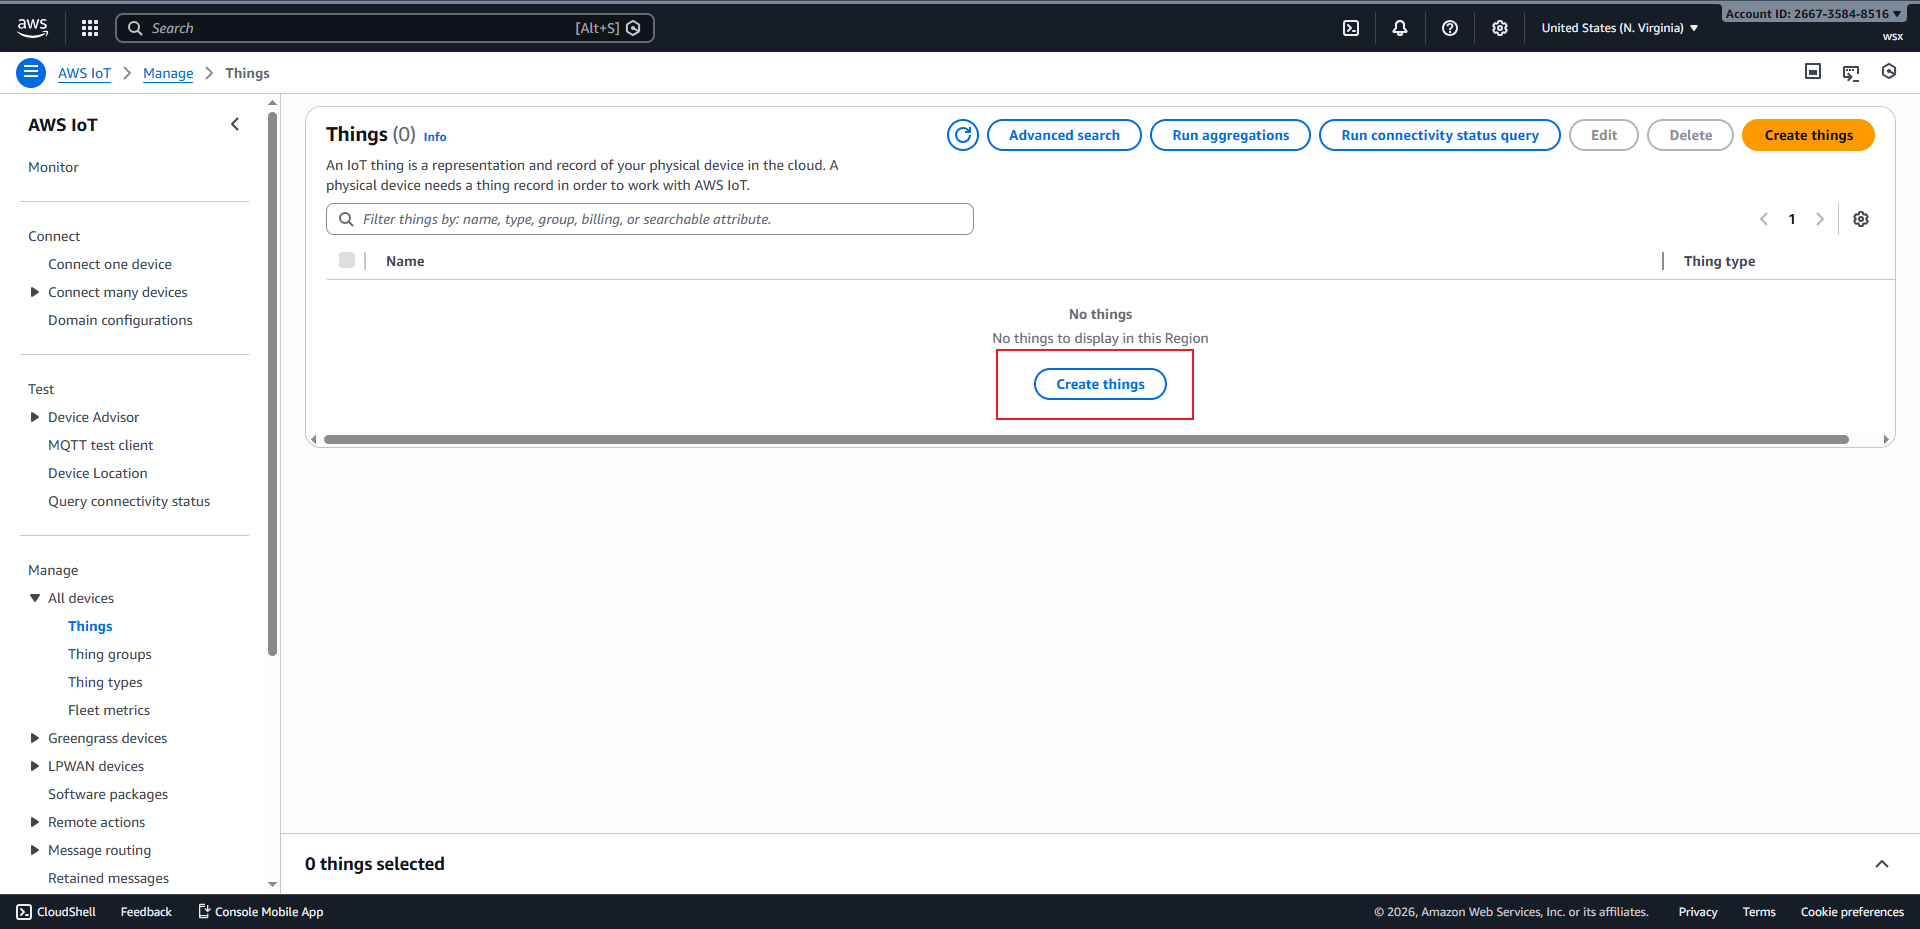
Things page#
Click
Create Thingsto enter the device creation page.
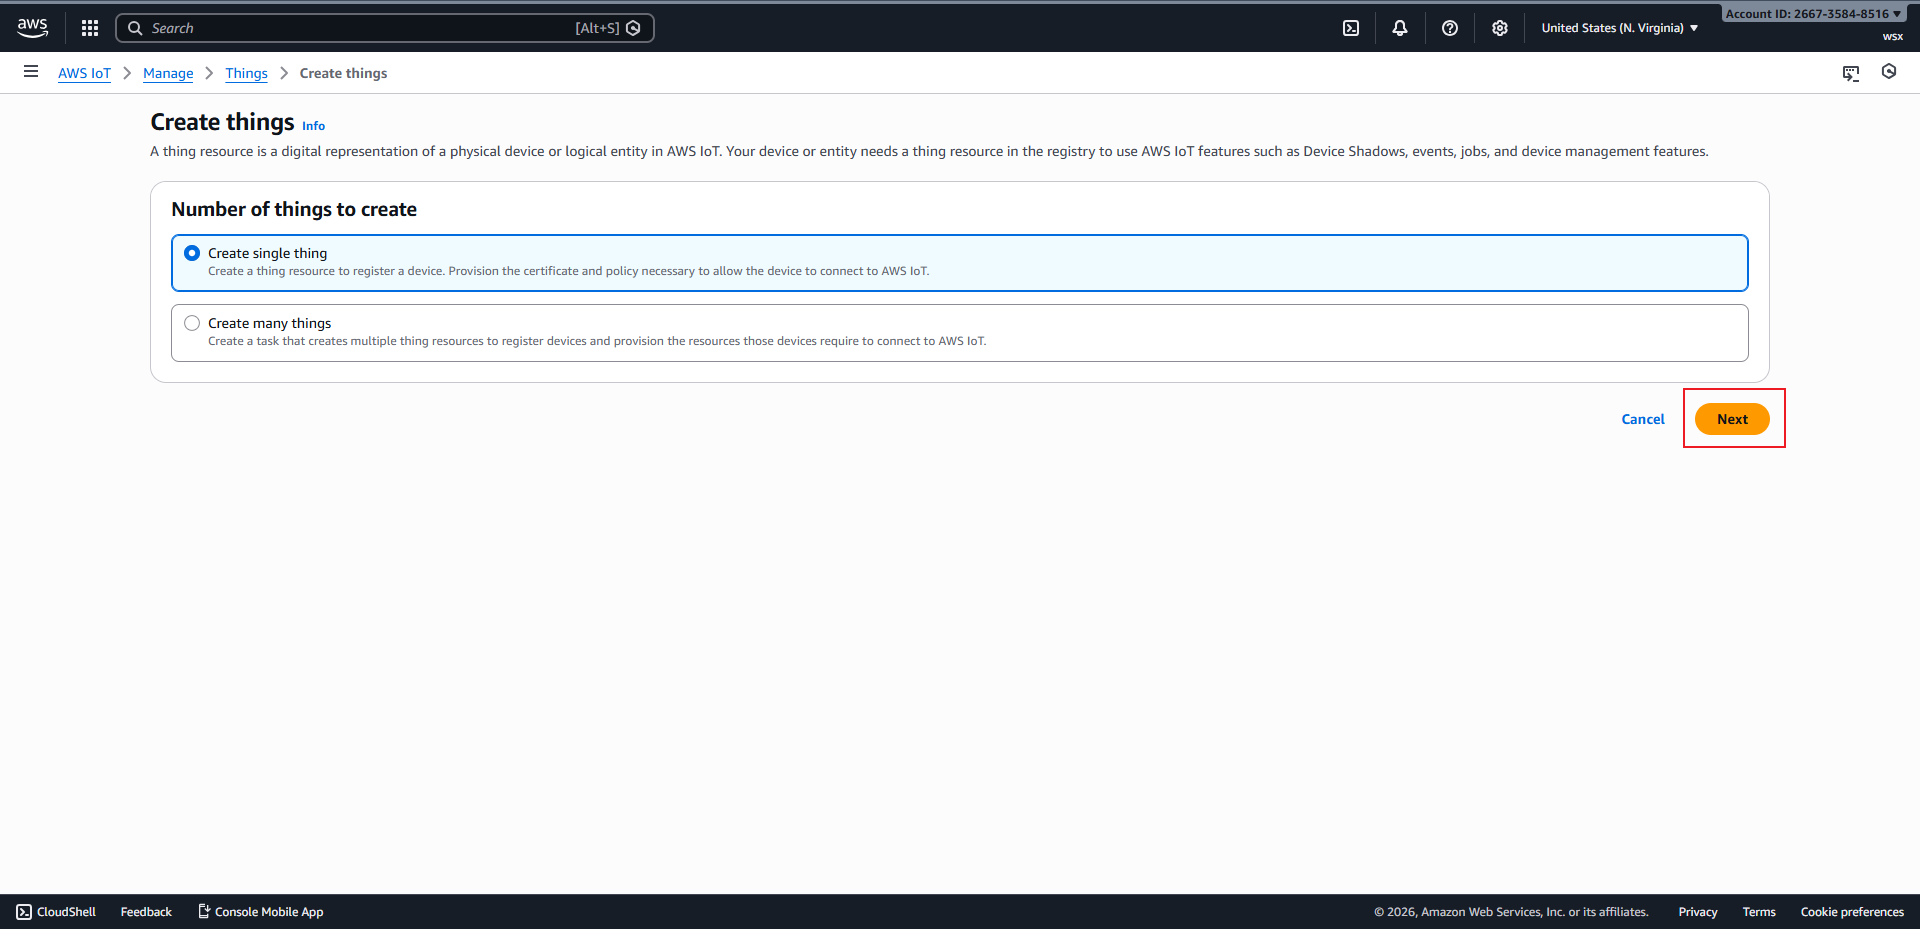
Create Things page#
Click
Nextto enter the device property setting page.
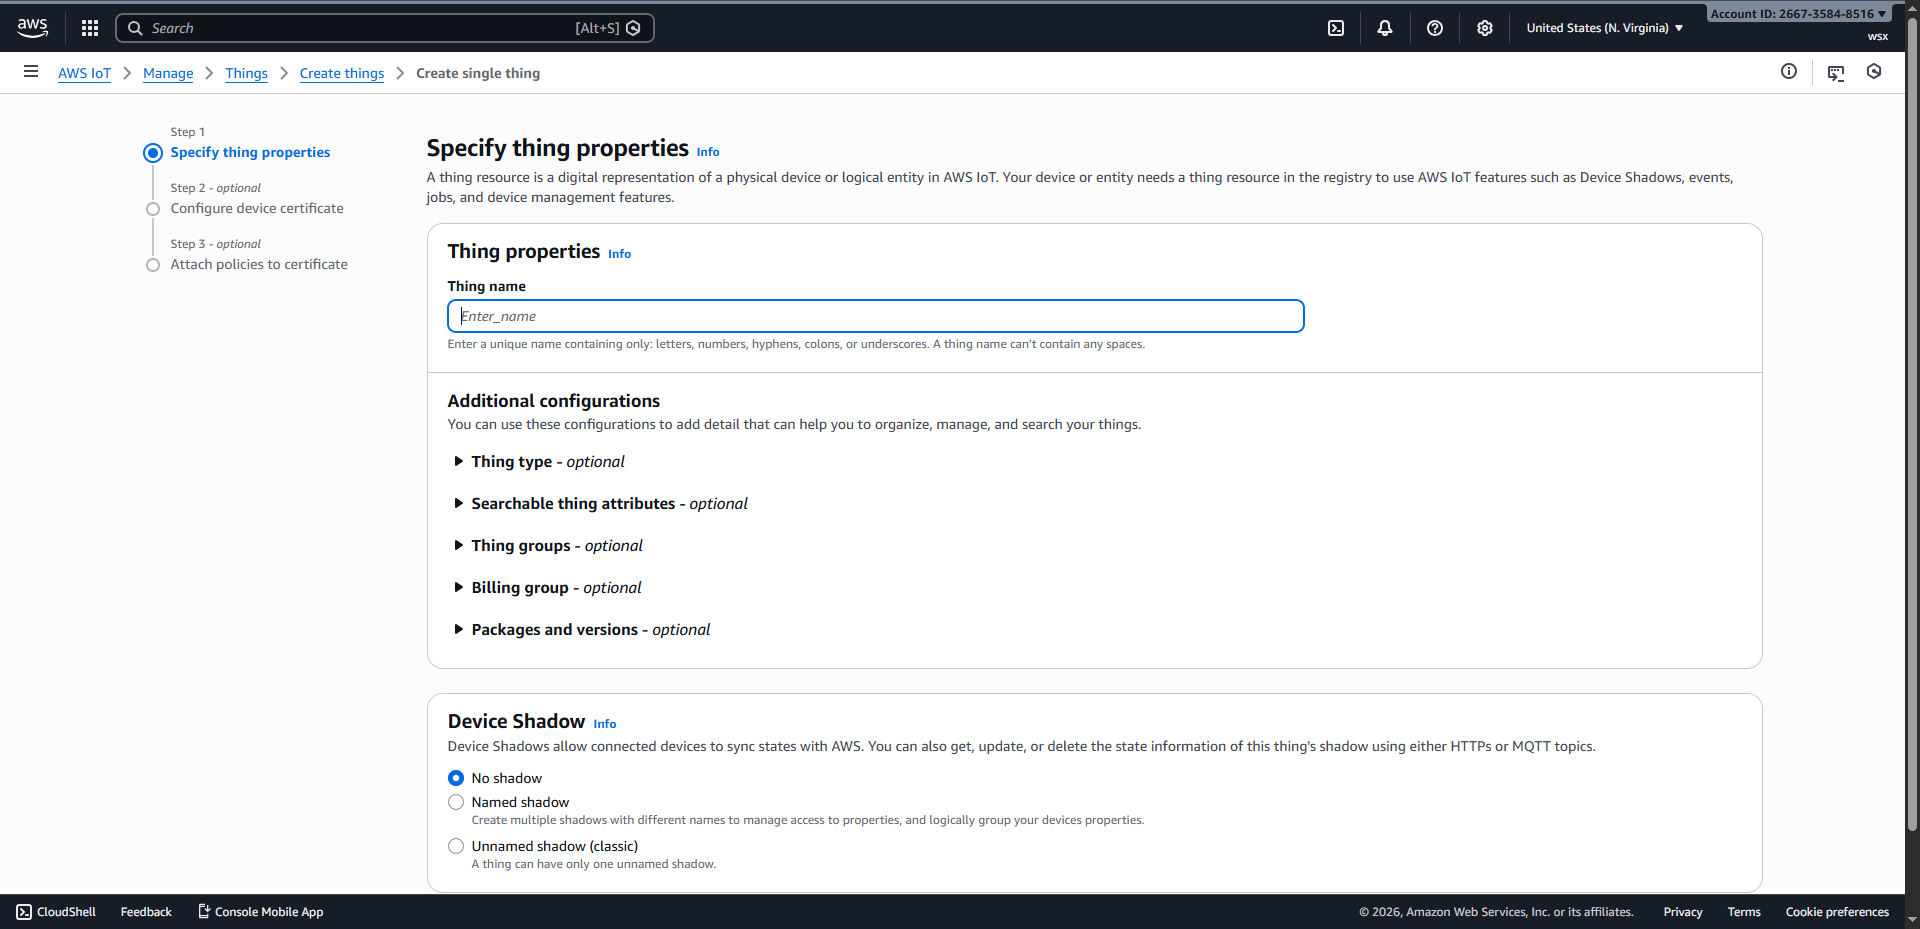
Specify things properties#
After entering the Thing name, click
Nextto enter the device certificate configuration page.
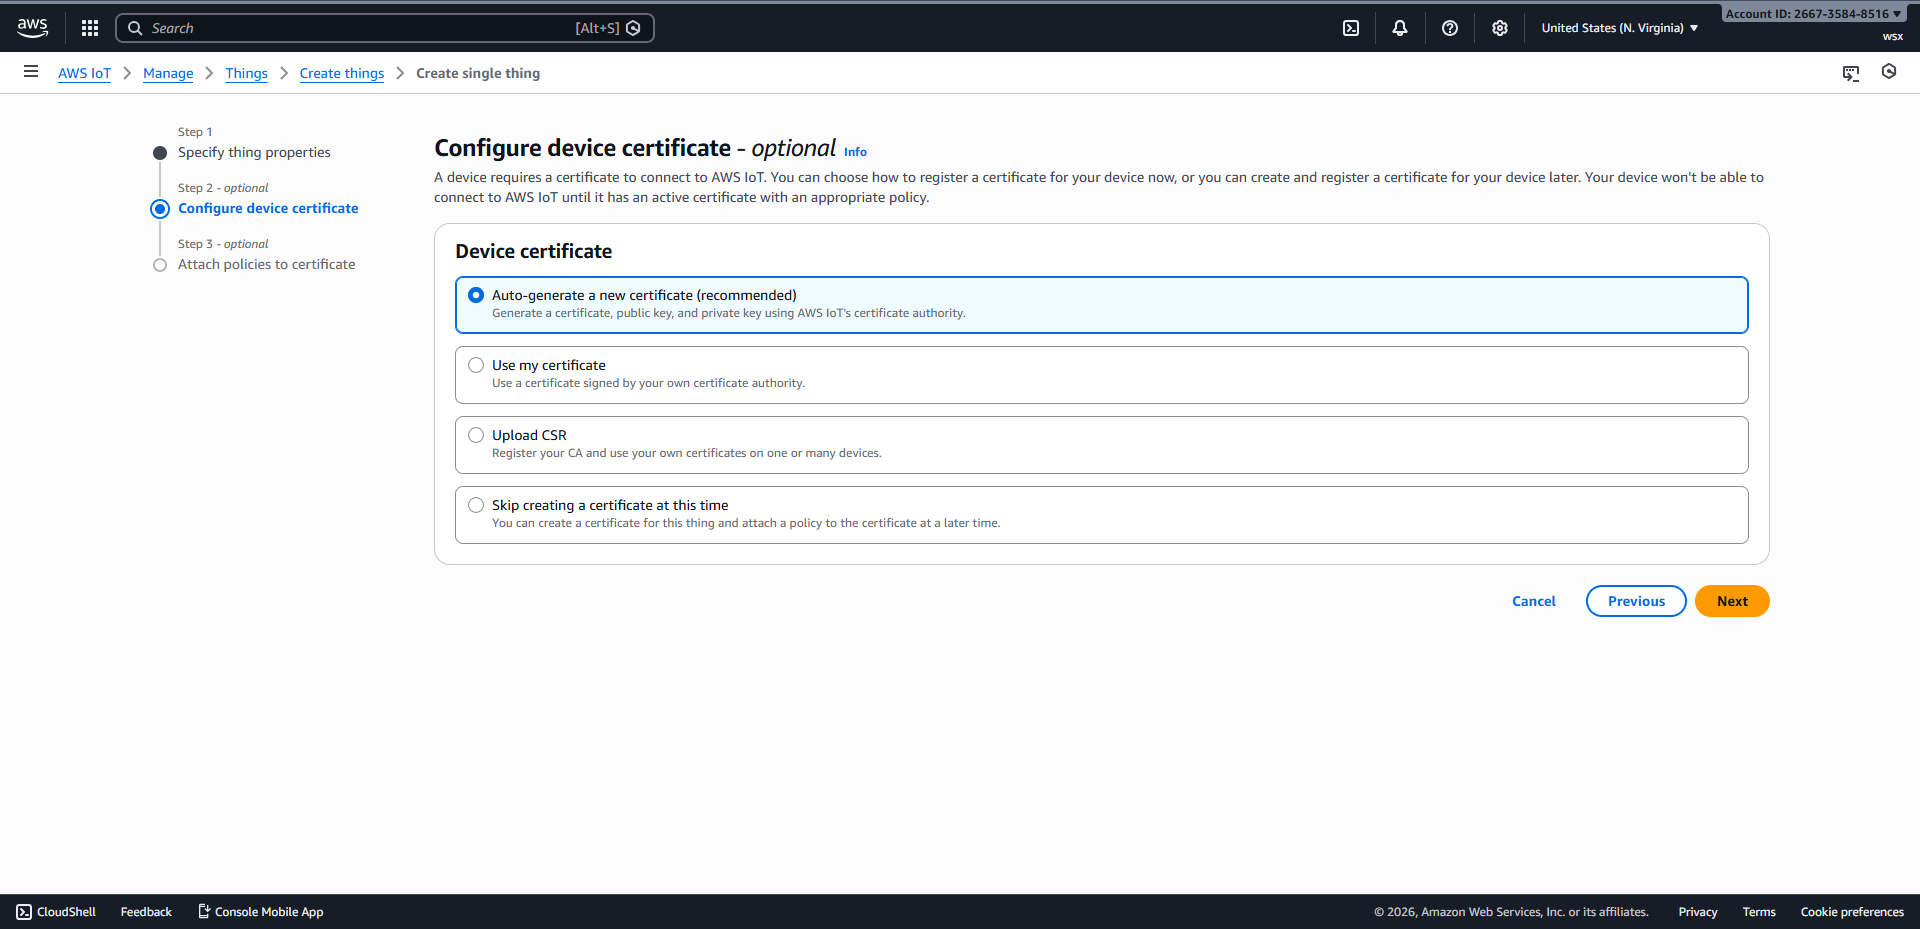
Configure device certificate#
Click
Nextto enter the certificate policy binding page.
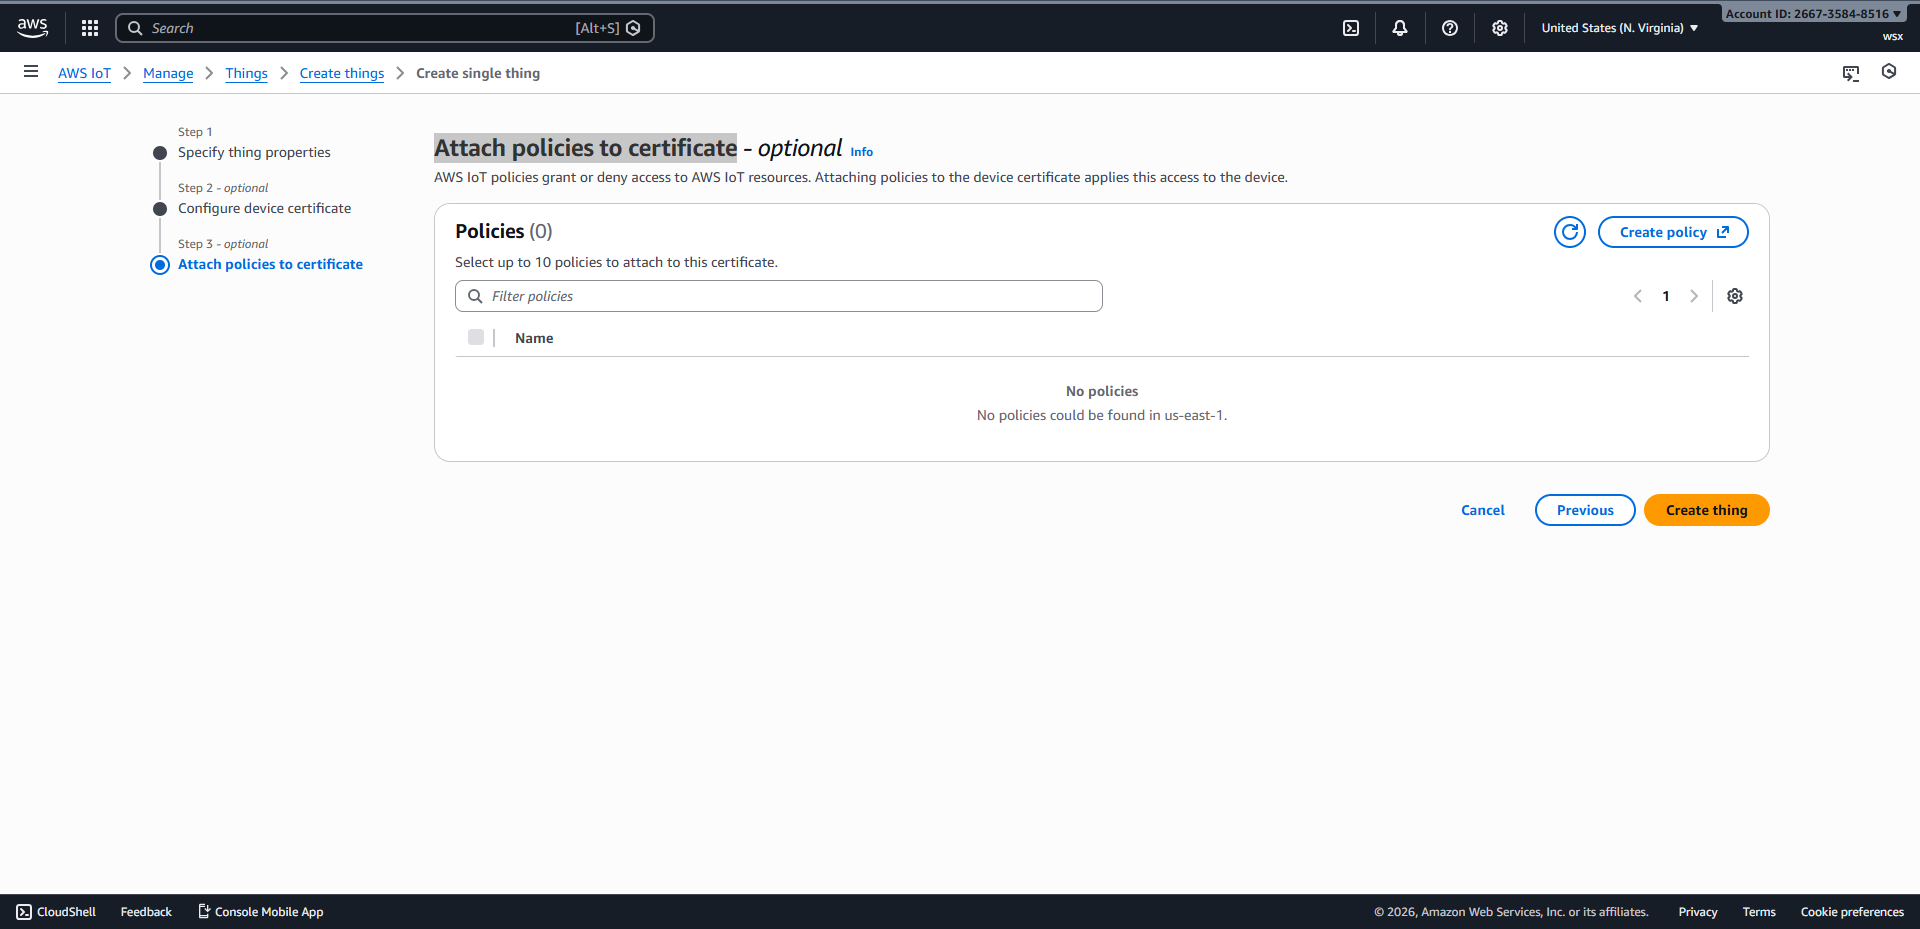
Attach policies to certificate#
Click
Create policyto enter the policy creation page, enter the policy name, copy the following content into the JSON input box, and then clickCreateto complete creation.
 1{
 2  "Version": "2012-10-17",
 3  "Statement": [
 4    {
 5      "Effect": "Allow",
 6      "Action": [
 7        "iot:Publish",
 8        "iot:Receive",
 9        "iot:PublishRetain"
10      ],
11      "Resource": "*"
12    },
13    {
14      "Effect": "Allow",
15      "Action": "iot:Subscribe",
16      "Resource": "*"
17    },
18    {
19      "Effect": "Allow",
20      "Action": "iot:Connect",
21      "Resource": "*"
22    }
23  ]
24}
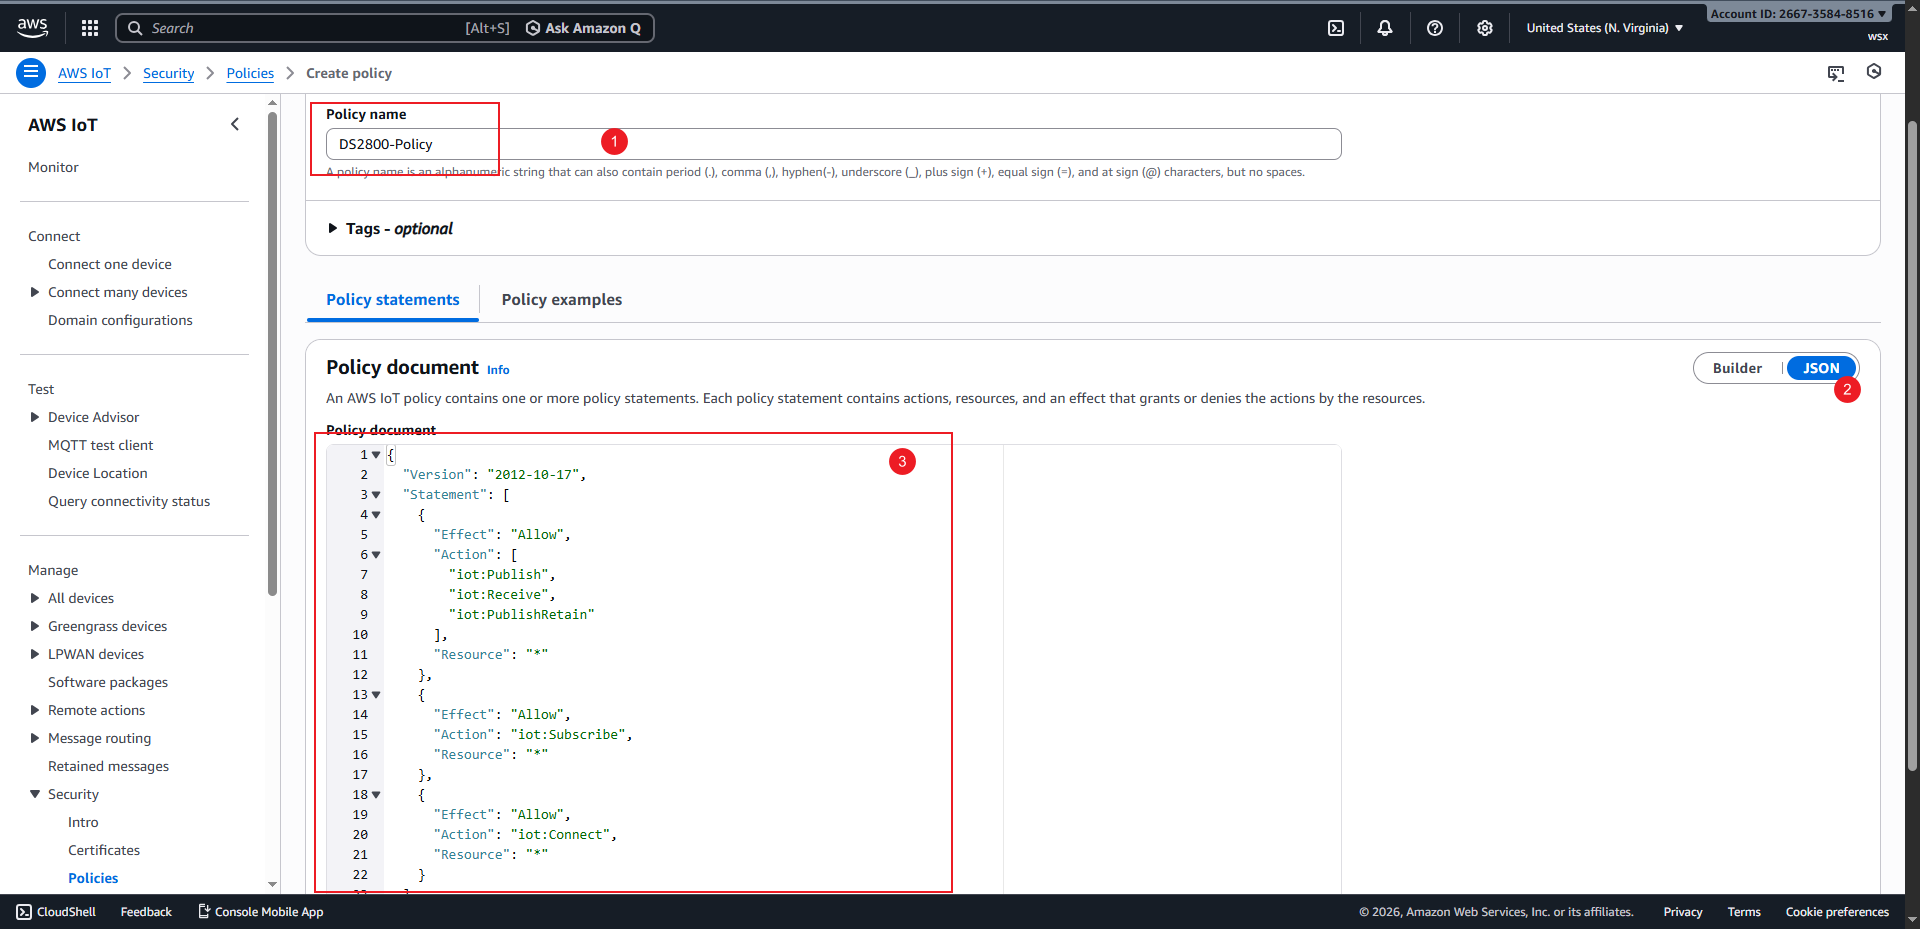
Create policy page#
Return to the
Attach policies to certificatepage, check the newly created policy, and clickCreate Thingsto complete device creation.
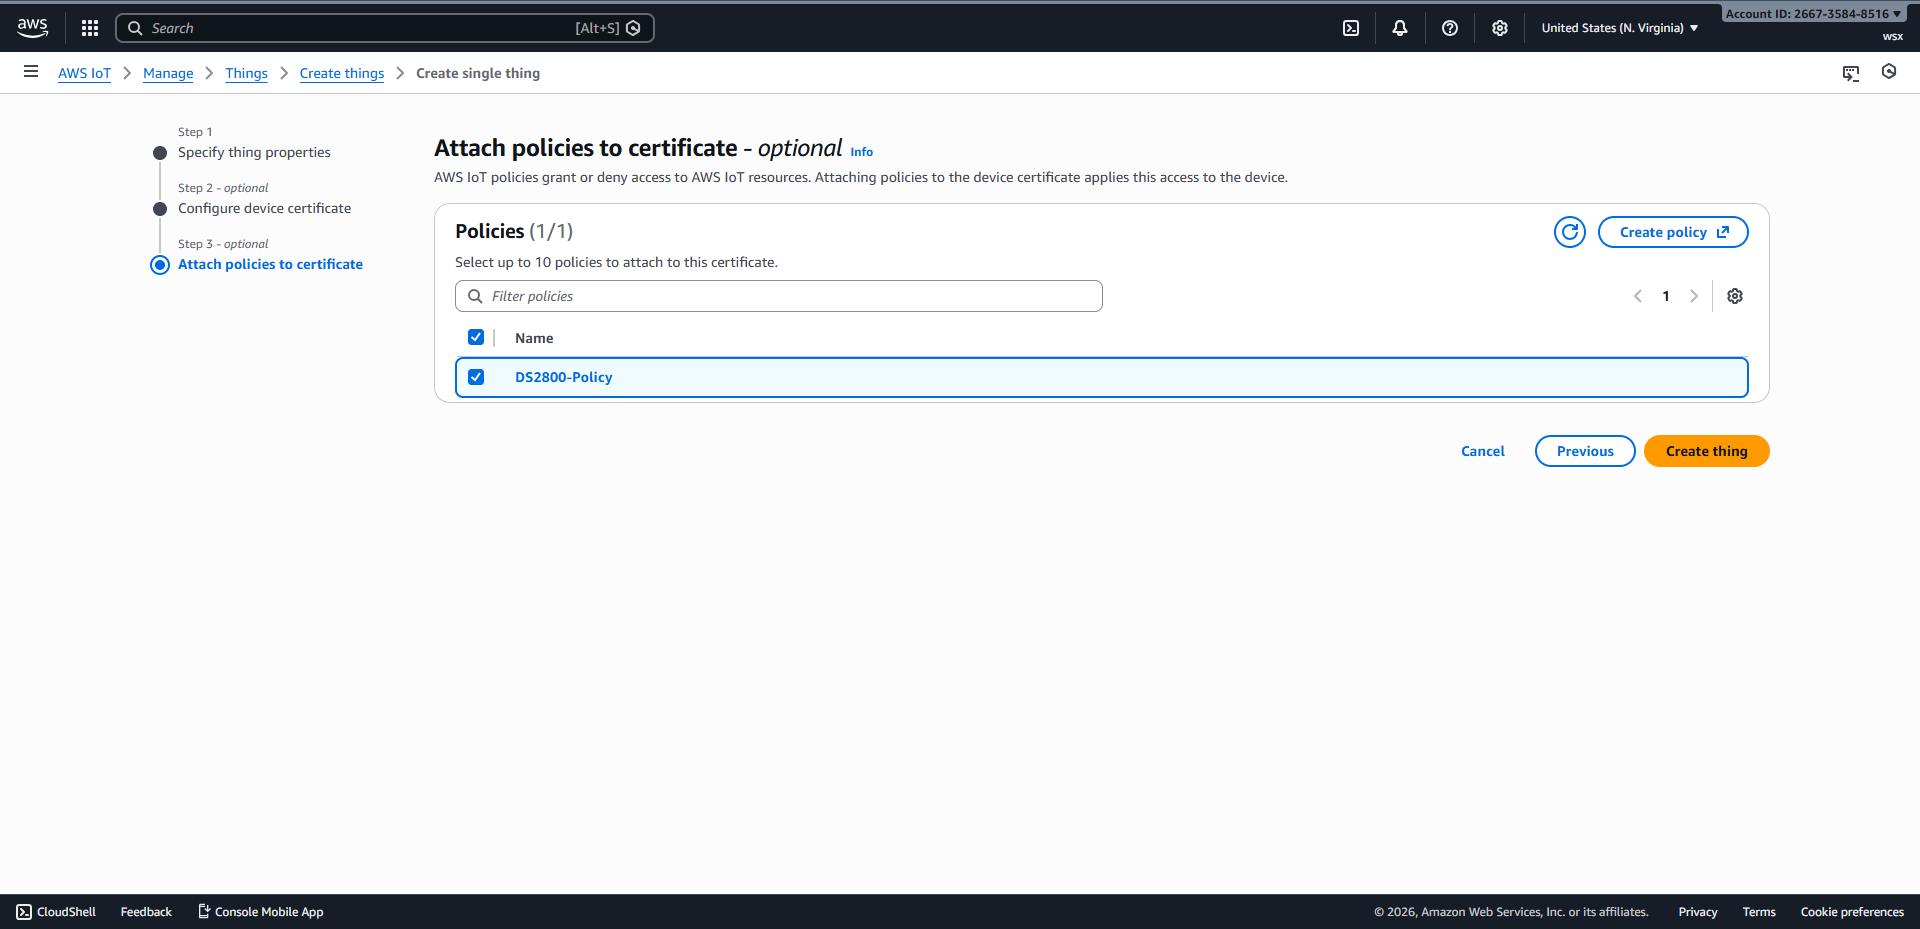
Bind policy and create Thing#
Download the certificate and private key first, then click
Doneto complete the device creation process.
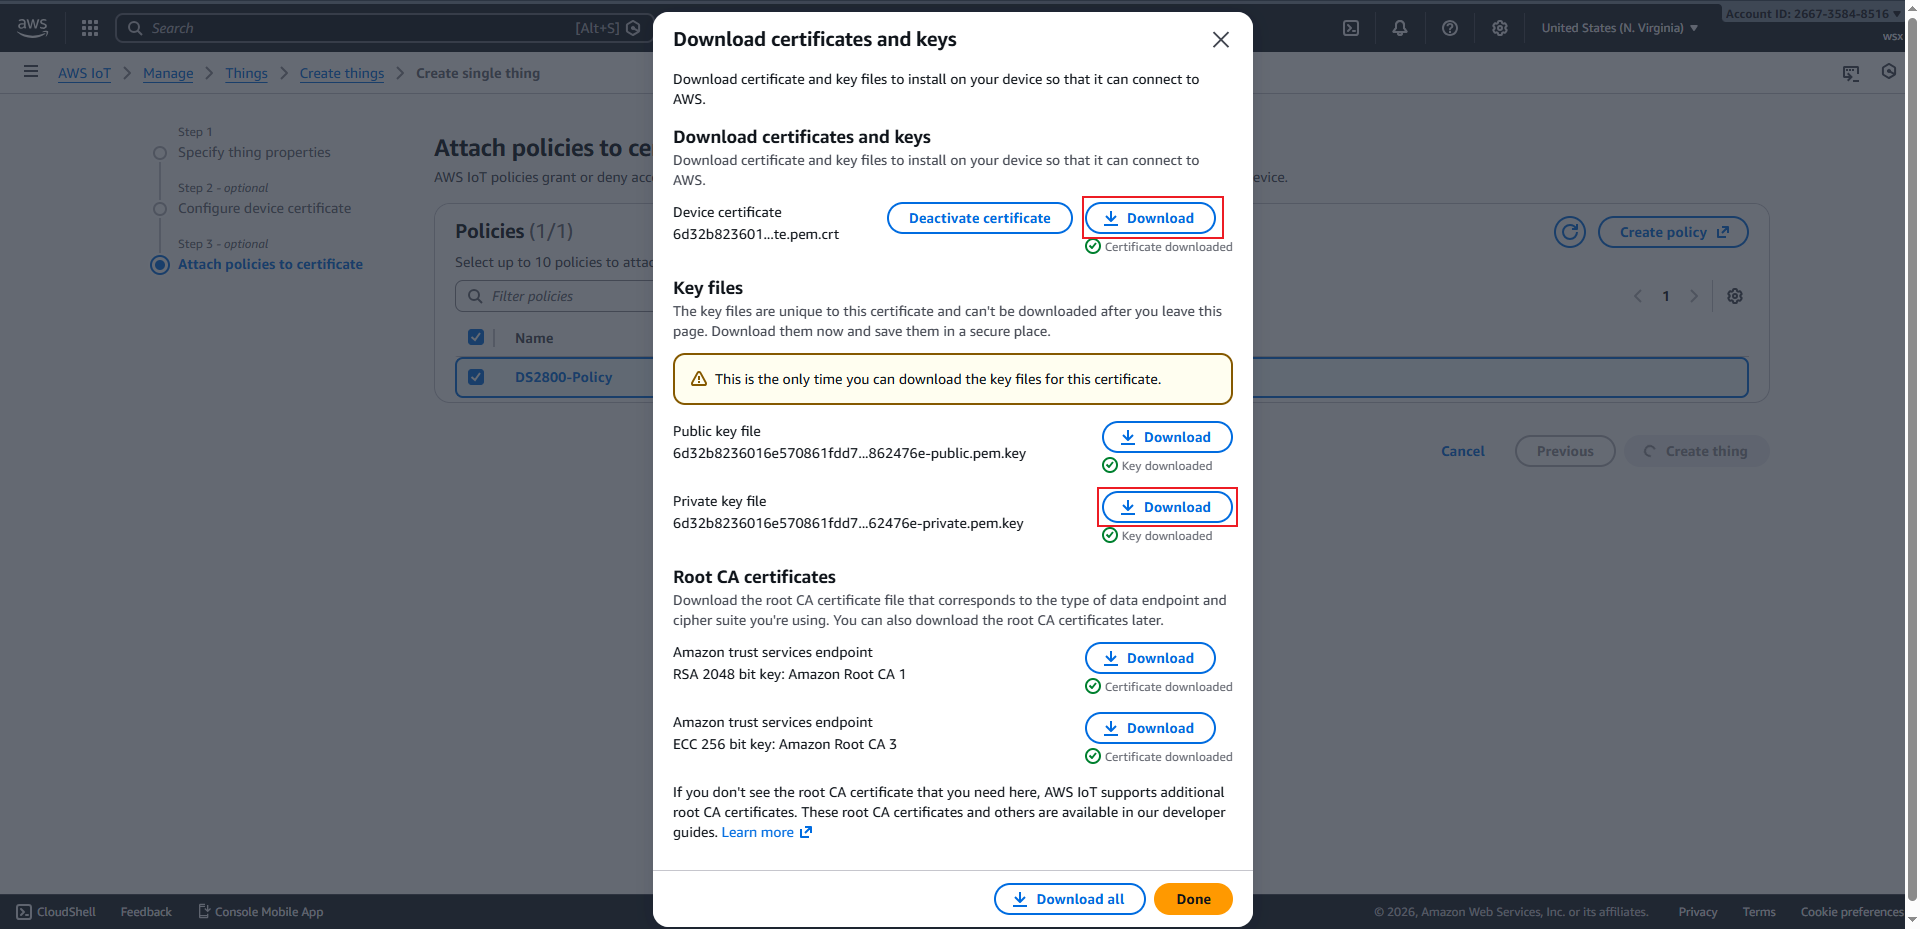
Download certificate and private key#
Configure Barcode Reader#
Set MQTT mode#
MQTTs mode#
Set MQTT port to 8883#

MQTT port 8883#
Set client certificate#
Static command instructions
If the interactive HTML tool is unavailable, replace the placeholders as described in this section and verify the command.
AT+CLICERT=<PEM-certificate>
Warning
Display the certificate QR code only on a trusted local device. Do not capture screenshots or send it through chat. Click Clear and close the page immediately after configuration.
Set private key#
Static command instructions
If the interactive HTML tool is unavailable, replace the placeholders as described in this section and verify the command.
AT+CLIKEY=<PEM-private-key>
Warning
Display the private-key QR code only on a trusted local device. Do not capture screenshots or send it through chat. Click Clear and close the page immediately after configuration.
Configure Wi-Fi and Broker#
Tip
After entering the corresponding Wi‑Fi information and service address, the Barcode Reader will actively connect to AWS IoT. After the connection succeeds, the green indicator light on the Barcode Reader will stay on.
Static command instructions
If the interactive HTML tool is unavailable, replace the placeholders as described in this section and verify the command.
AT+URL=2,<broker>,,,<publish-topic>,0;AT+RAP=<ssid>[,<wifi-password>]
MQTT test client#
Click MQTT test client to enter the page.
After entering the topic to subscribe to and clicking
Subscribe, use the Barcode Reader to scan a barcode. You can then receive the data uploaded by the Barcode Reader.
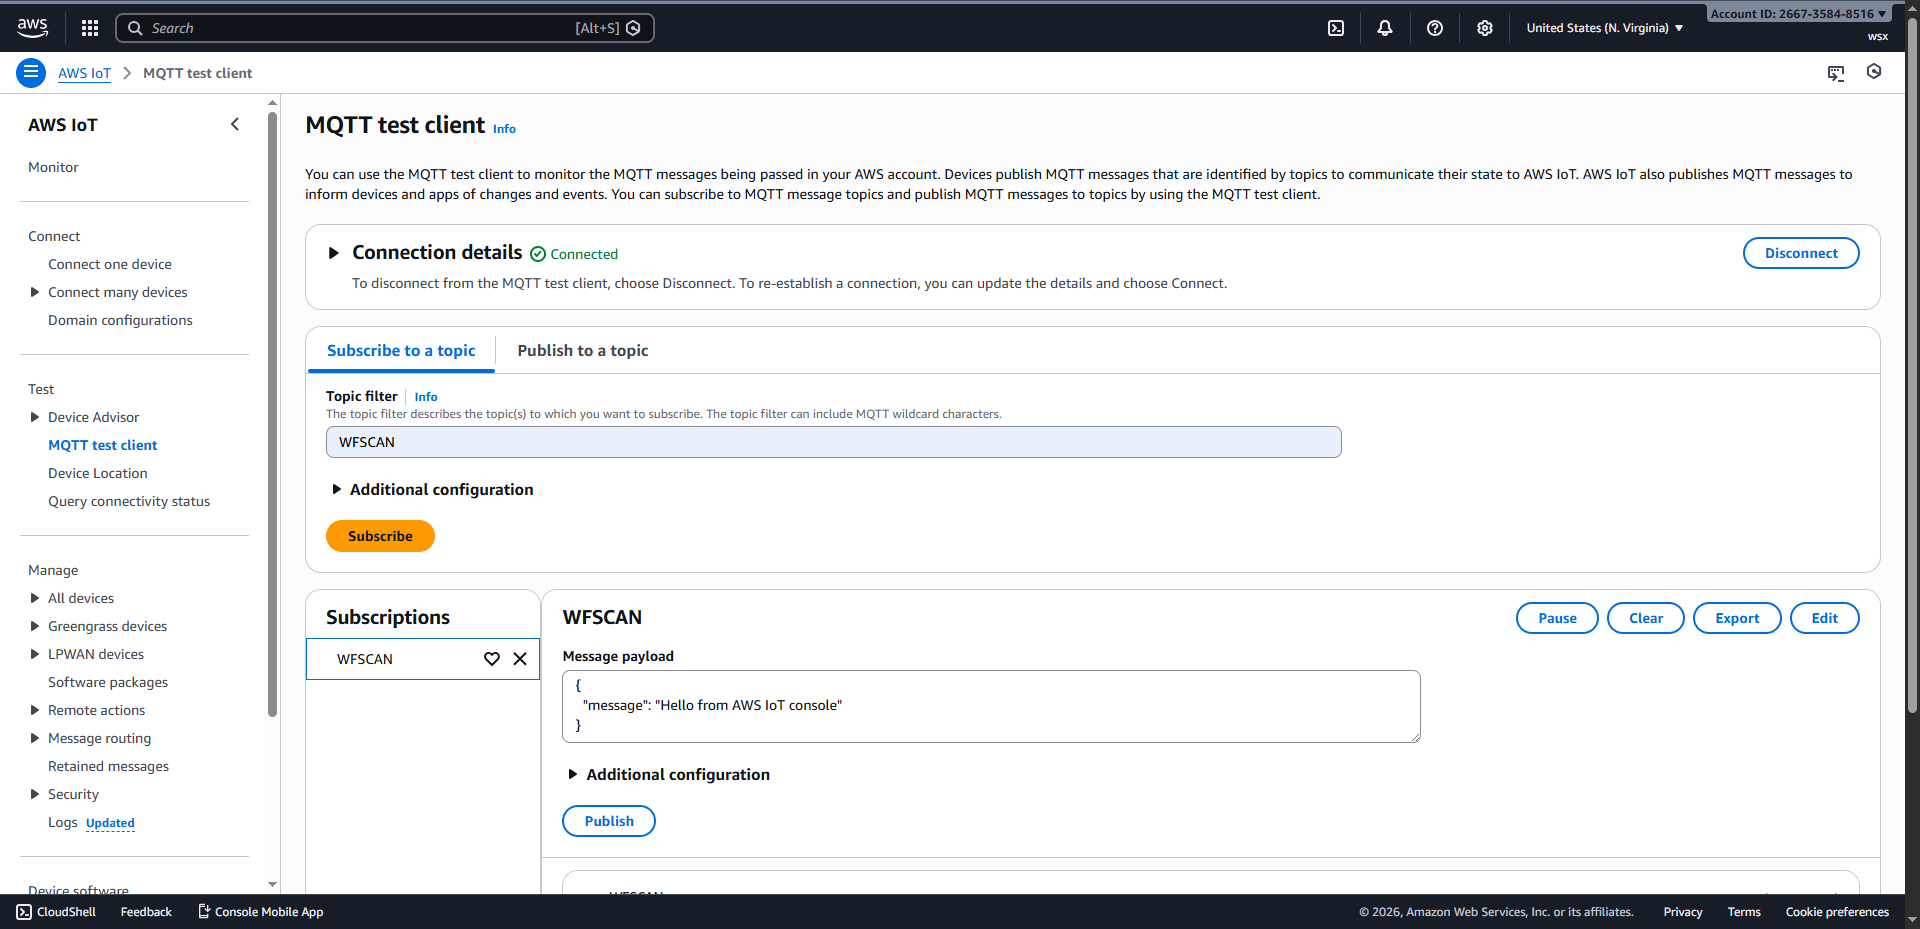
MQTT test client page#