Data Editing#
Character Set#
Input Character Set#
To configure the character set used by the Barcode Data, scan the “Input Character Set” Parameter Barcode.
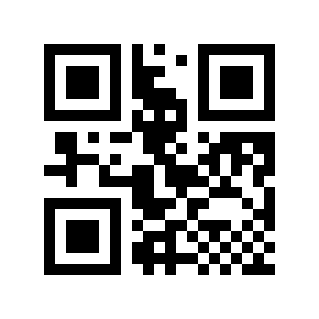
* Automatic# |
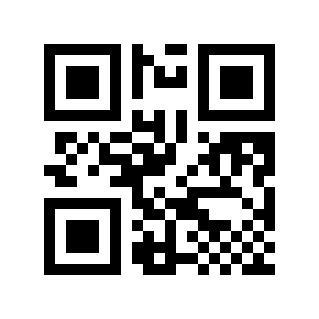
GBK# |
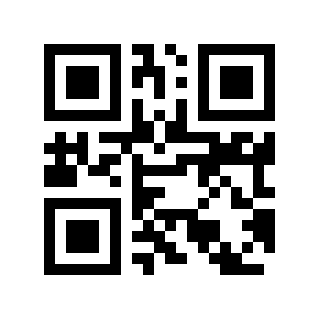
UTF-8# |
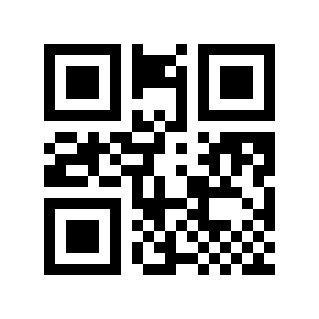
ASCII# |
Shift-JISJapanese# |
Output Character Set#
In order to meet the needs of the host character set, you can set it by reading the “output character set”.
*original Format# |
GBK# |
UTF-8# |
Barcode ID#
AIM ID#
AIM is the abbreviation of Automatic Identification Manufacturers (Automatic Identification Manufacturers Association). AIM ID defines identification codes for various standard barcodes (users cannot customize AIM ID). For specific definitions, see AIM ID. The Scan Engine can add this identification code in front of the barcode data after decoding. The format is: “]” + letter “C” + number “0”. For example, the AIM ID of Code 128 is “]C0”. Users can identify different barcode types through AIM ID.
* Disable# |
Enable# |
Code ID#
Users can identify different barcode types through Code ID, which uses one character for identification. For the specific definition, see Code ID
* Disable# |
Enable# |
Terminator#
To help the host distinguish consecutive scan results, enable the Terminator function. The Scan Engine appends the selected Terminator to the Output Data.
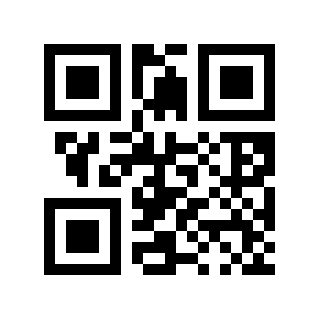
Disable# |
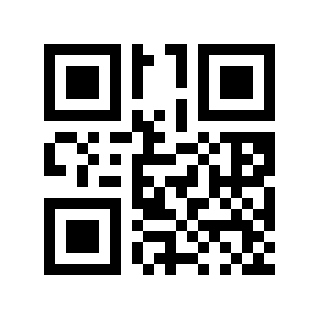
Carriage Return and Line Feed# |
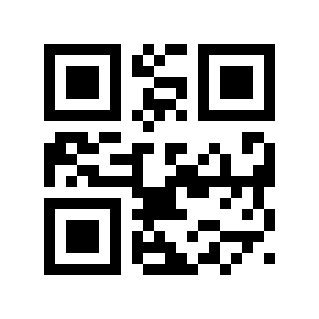
* Enter# |
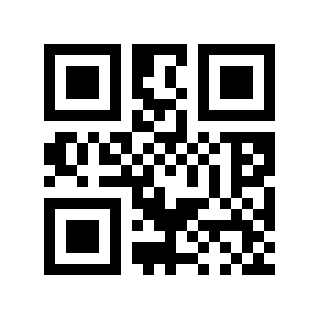
TAB# |
Enter Enter# |
Prefix#
Prefix Switch#
A Prefix is a user-defined string appended before the Output Data. Scan the “Enable” Parameter Barcode to add it, or the “Disable” Parameter Barcode to remove it.
* Disable# |
Enable# |
Prefix Content Settings#
There are two methods for prefix setting. Method 1 requires the user to generate a QR code and is more flexible when configuring multiple values. Method 2 uses the Parameter Barcodes in this manual; scan them in the specified sequence.
Add prefix to Parameter Barcode content format: >!010800XX.
XXSet the variable, using hexadecimal representation, two characters are one unit, any shortage is filled with 0, it can be superimposed arbitrarily, and a maximum of 10-digit data prefix is supported.
Example
You need to set the prefix character A, check ASCII Code Comparison Table, the hexadecimal value is
41, then the Parameter Barcode content is:>!01080041.You need to set the prefix characters A B C, check ASCII Code Comparison Table, the hexadecimal values are
41 42 43, then the Parameter Barcode content is:>!010800414243.
Scan the “Prefix Settings” Parameter Barcode
Prefix Settings#
Scan the Numeric Barcodes in pairs.
Example
You need to set the prefix character A, check ASCII Code Comparison Table, the hexadecimal value is
41, then scan4and1respectivelyYou need to set the prefix character ABC, check ASCII Code Comparison Table, the hexadecimal value is
414243, then scan4,1,4,2,4,3respectively
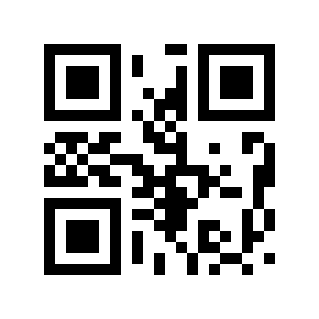
Scan the “OK” Parameter Barcode to complete the setup.
Sure#
Suffix#
Suffix Switch#
A Suffix is a user-defined string appended after the Output Data. Scan the “Enable” Parameter Barcode to add it, or the “Disable” Parameter Barcode to remove it.
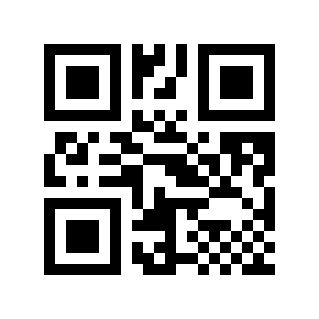
* Disable# |
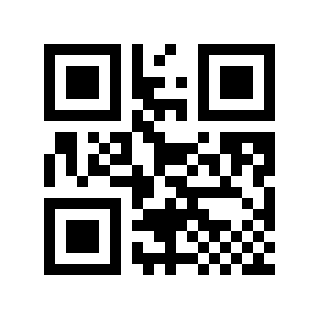
Enable# |
Suffix Content Settings#
There are two methods for suffix setting. Method 1 requires the user to generate a QR code and is more flexible when configuring multiple values. Method 2 uses the Parameter Barcodes in this manual; scan them in the specified sequence.
Add suffix to Parameter Barcode content format: >!010801XX.
XXSet the variable, using hexadecimal representation, two characters are one unit, any shortage is filled with 0, it can be superimposed arbitrarily, and a maximum of 10 suffixes are supported.
Example
You need to set the suffix character A, check ASCII Code Comparison Table, the hexadecimal value is
41, then the Parameter Barcode content is:>!01080141.You need to set the suffix character ABC, check ASCII Code Comparison Table, the hexadecimal value is
414243, then the Parameter Barcode content is:>!010801414243.
Scan the “Suffix Settings” Parameter Barcode
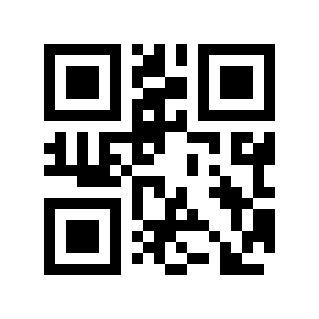
Suffix Settings#
Scan the Numeric Barcodes in pairs.
Example
You need to set the suffix character A, check ASCII Code Comparison Table, the hexadecimal value is
41, then scan4and1respectivelyYou need to set the suffix character ABC, check ASCII Code Comparison Table, the hexadecimal value is
414243, then scan4,1,4,2,4,3respectively
Scan the “OK” Parameter Barcode to complete the setup.
Sure#
Add Prefix Based On Barcode Type#
Add Prefix Switch Based On Barcode Type#
A Prefix is a user-defined string appended before the Output Data. Scan the “Enable” Parameter Barcode to add it, or the “Disable” Parameter Barcode to remove it.
* Disable# |
Enable# |
Add Prefix Content Settings Based On Barcode Type#
There are two methods for setting the prefix content. Method 1 requires the user to generate a QR code and is more flexible when configuring multiple values. Method 2 uses the Parameter Barcodes in this manual; scan them in the specified sequence.
Add a prefix according to the barcode type to set the code content format: >!010806XXXX.
XXXXSet variables.
- The first two
XX Indicates the barcode type. The related hexadecimal value can be found according to Barcode Types.
- The last two
XX Use hexadecimal representation, two characters are one unit, and the remaining characters are filled with 0. They can be superimposed arbitrarily, and a maximum of 10-bit data prefix is supported.
Example
Code 128 barcode prefix character A needs to be set. According to Barcode Types, the hexadecimal value of Code 128 is
01. Check ASCII Code Comparison Table. The hexadecimal value of characterAis41, then the Parameter Barcode content is:>!0108060141.To set the Code 128 prefix characters A B C, look up Code 128 in Barcode Types; its hexadecimal value is
01. Then look up A B C in ASCII Code Comparison Table; their hexadecimal values are41 42 43. The Parameter Barcode data is>!01080601414243.
Scan the “Prefix Settings” Parameter Barcode
Prefix Settings#
Set the symbology by scanning the Numeric Barcodes in pairs.
Example
You need to set a prefix for Code 128. According to Barcode Types, the hexadecimal value of the barcode type of Code 128 is
01, then scan0and1respectively.
Set the prefix content by scanning the Numeric Barcodes in pairs.
Example
You need to set the prefix character A, check ASCII Code Comparison Table, the character
Ais41in hexadecimal, then scan4and1respectively
Scan the “OK” Parameter Barcode to complete the setup.
Sure#
Clear Prefix by Barcode Type#
Clear the prefix that has been set. There are two methods to clear the prefix. The first method requires the user to generate a QR code, which is more flexible for more users. The second method can scan the Parameter Barcode in this manual according to the steps.
Clear prefix Parameter Barcode content format according to barcode type: >!010808XX.
XXSet a variable to represent the barcode type, using hexadecimal; the relevant hexadecimal value can be found according to Barcode Types. Two characters are a unit, and any shortage is filled with 0.
Example
The Code 128 barcode prefix needs to be cleared. According to Barcode Types, the hexadecimal value of Code 128 is
01, then the Parameter Barcode content is:>!01080801.
Scan the “Clear Prefix” Parameter Barcode
Clear Prefix#
Clear the symbology by scanning the Numeric Barcodes in pairs.
Example
The Code 128 prefix needs to be cleared. According to Barcode Types, the hexadecimal value of the barcode type of Code 128 is
01, then scan0and1respectively.
Scan the “OK” Parameter Barcode to complete the setup.
Sure#
Add Suffix Based On Barcode Type#
Add Suffix Switch According To Barcode Type#
A Suffix is a user-defined string appended after the Output Data. Scan the “Enable” Parameter Barcode to add it, or the “Disable” Parameter Barcode to remove it.
* Disable# |
Enable# |
Add Suffix Content Settings According To Barcode Type#
There are two methods for setting the suffix content. Method 1 requires the user to generate a QR code and is more flexible when configuring multiple values. Method 2 uses the Parameter Barcodes in this manual; scan them in the specified sequence.
Add a suffix according to the barcode type to set the code content format: >!010807XXXX.
XXXXSet variables.
- The first two
XX Indicates the barcode type. The related hexadecimal value can be found according to Barcode Types.
- The last two
XX Use hexadecimal representation, two characters are one unit, and the remaining characters are filled with 0. They can be superimposed arbitrarily, and a maximum of 10-digit data suffix is supported.
Example
Code 128 barcode suffix character A needs to be set. According to Barcode Types, the hexadecimal value of Code 128 is
01. Check ASCII Code Comparison Table. The hexadecimal value of characterAis41, then the Parameter Barcode content is:>!0108070141.To set the Code 128 suffix characters A B C, look up Code 128 in Barcode Types; its hexadecimal value is
01. Then look up A B C in ASCII Code Comparison Table; their hexadecimal values are41 42 43. The Parameter Barcode data is>!01080701414243.
Scan the “Suffix Settings” Parameter Barcode
Suffix Settings#
Set the symbology by scanning the Numeric Barcodes in pairs.
Example
You need to set a suffix for Code 128. According to Barcode Types, the hexadecimal value of the barcode type of Code 128 is
01, then scan0and1respectively.
Set the suffix content by scanning the Numeric Barcodes in pairs.
Example
You need to set the suffix character A, check ASCII Code Comparison Table, the hexadecimal value of character
Ais41, then scan4and1respectively
Scan the “OK” Parameter Barcode to complete the setup.
Sure#
Clear Suffix by Barcode Type#
Clear the suffix that has been set. There are two methods to clear the suffix. The first method requires the user to generate a QR code, which is more flexible for more users. The second method can scan the Parameter Barcode in this manual according to the steps.
Clear the suffix Parameter Barcode content format according to the barcode type: >!010809XX.
XXSet a variable to represent the barcode type, using hexadecimal; the relevant hexadecimal value can be found according to Barcode Types. Two characters are a unit, and any shortage is filled with 0.
Example
The Code 128 barcode suffix needs to be cleared. According to Barcode Types, the hexadecimal value of Code 128 is
01, then the Parameter Barcode content is:>!01080901.
Scan the “Clear Suffix” Parameter Barcode
Clear Suffix#
Clear the symbology by scanning the Numeric Barcodes in pairs.
Example
The Code 128 suffix needs to be cleared. According to Barcode Types, the hexadecimal value of the barcode type of Code 128 is
01, then scan0and1respectively.
Scan the “OK” Parameter Barcode to complete the setup.
Sure#
Hide Fixed Characters#
This function can hide strings that the user does not need to output based on needs.
Hide Fixed Character Switch#
* Disable# |
Enable# |
Hide Fixed Character Settings#
There are two methods for hiding fixed character settings. Method 1 requires the user to generate a QR code and is more flexible when configuring multiple values. Method 2 uses the Parameter Barcodes in this manual; scan them in the specified sequence.
Hide fixed character Parameter Barcode content format: >!010802XX.
XXSet variables in hexadecimal notation. Two characters are one unit. Any deficiencies are filled with 0s. They can be superimposed arbitrarily. A maximum of 20 digits are supported.
Example
You need to set the hidden character A, check ASCII Code Comparison Table, the hexadecimal value is
41, then the Parameter Barcode content is:>!01080241.You need to set the hidden character ABC, check ASCII Code Comparison Table, the hexadecimal value is
414243, then the Parameter Barcode content is:>!010802414243.
Scan the “Hide Fixed Characters” Parameter Barcode
Hide Fixed Characters#
Scan the Numeric Barcodes in pairs.
Example
If you need to hide character A, check ASCII Code Comparison Table. The hexadecimal value is
41, then scan4and1respectively.If you need to hide line breaks, check ASCII Code Comparison Table. If the hexadecimal value is
0A, scan0andArespectively.
Scan the “OK” Parameter Barcode to complete the setup.
Sure#
Keep Barcode Data Based On Length#
This function can retain the data required by the user in the barcode according to needs.
Keep Data Switch#
* Disable# |
Forward Index# |
Reverse Index# |
Note
Forward index (from the front end of the data to the starting position); reverse index (from the back end of the data to the starting position)
Keep Data Starting Position#
There are two methods for initial setting. Method 1 requires the user to generate a QR code and is more flexible when configuring multiple values. Method 2 uses the Parameter Barcodes in this manual; scan them in the specified sequence.
Starting position Parameter Barcode content format: >!00102AXX.
XXSet variable, decimal range
1-65535.
Example
If the start position is set to
11, the Parameter Barcode content is:>!00102A11.
Keep Data End Position#
There are two methods to end the settings. Method 1 requires the user to generate a QR code and is more flexible when configuring multiple values. Method 2 uses the Parameter Barcodes in this manual; scan them in the specified sequence.
End position Parameter Barcode content format: >!00102BXX.
XXSet variable, decimal range
1-65535.
Example
If the end position is set to
50, the Parameter Barcode content is:>!00102B50.
Hide Barcode Data Based On Length#
This function can hide the data in the barcode that the user does not need according to the needs.
Hide Barcode Data Switch#
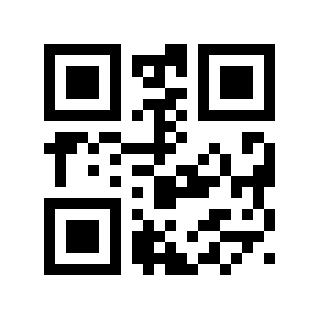
* Disable# |
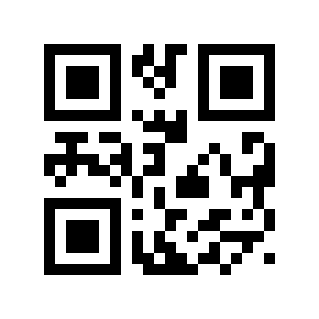
Forward Index# |
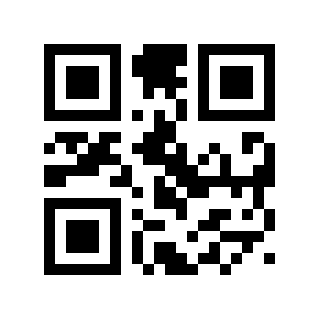
Reverse Index# |
Note
Forward index (from the front end of the data to the starting position); reverse index (from the back end of the data to the starting position)
Hide Starting Position Of Barcode Data#
There are two methods for initial setting. Method 1 requires the user to generate a QR code and is more flexible when configuring multiple values. Method 2 uses the Parameter Barcodes in this manual; scan them in the specified sequence.
Starting position Parameter Barcode content format: >!001027XX.
XXSet variable, decimal range
1-65535.
Example
If the starting position is set to
11, the Parameter Barcode content is:>!00102711.
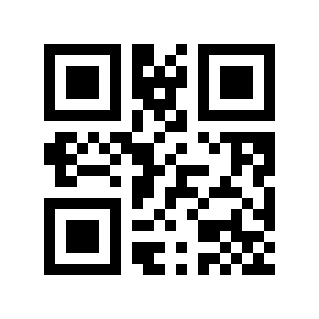
Hide Barcode Data End Position#
There are two methods to end the settings. Method 1 requires the user to generate a QR code and is more flexible when configuring multiple values. Method 2 uses the Parameter Barcodes in this manual; scan them in the specified sequence.
End position Parameter Barcode content format: >!001028XX.
XXSet variable, decimal range
1-65535.
Example
If the end position is set to
50, the Parameter Barcode content is:>!00102850.
Hide Barcode Data Of Any Length Based On Barcode Type#
This function can hide data that users do not need in the barcode according to the barcode type according to the needs.
Hide Barcode Data Switch Based On Barcode Type#
* Disable# |
Forward Index# |
Reverse Index# |
Note
Forward index (from the front end of the data to the starting position); reverse index (from the back end of the data to the starting position)
Hide Data Starting Position Based On Barcode Type#
There are two methods for initial setting. Method 1 requires the user to generate a QR code and is more flexible when configuring multiple values. Method 2 uses the Parameter Barcodes in this manual; scan them in the specified sequence.
The content format of the starting position of hidden data according to the barcode type is: >!01080AXXXX.
XXXXSet variables.
- The first two
XX Indicates the barcode type. The related hexadecimal value can be found according to Barcode Types.
- The last two
XX Use hexadecimal notation, two characters are one unit, any shortage is filled with 0, and the length range is
0x0000-0xFFFF.
Example
The starting position of Code 128 needs to be hidden and set to
11. According to Barcode Types, the hexadecimal value of Code 128 is01, and the hexadecimal value of 11 is0B, then the Parameter Barcode content is:>!01080A010B.
Scan the “Barcode Type and Starting Position” Parameter Barcode
Barcode Type And Starting Position#
Set the symbology by scanning the Numeric Barcodes in pairs.
Example
Code 128 needs to be hidden. According to Barcode Types, the hexadecimal value of the barcode type of Code 128 is
01, so scan0and1respectively.
Set the start position by scanning the Numeric Barcodes in pairs.
Hexadecimal input is used here.
Example
Character position
11corresponds to0B; scan0andB.The
100position corresponds to64, scan6,4.
Scan the “OK” Parameter Barcode to complete the setup.
Sure#
Hide Data End Position Based On Barcode Type#
There are two methods to end the settings. Method 1 requires the user to generate a QR code and is more flexible when configuring multiple values. Method 2 uses the Parameter Barcodes in this manual; scan them in the specified sequence.
The content format of the end position of hidden data according to the barcode type is: >!01080BXXXX.
XXXXSet variables.
- The first two
XX Indicates the barcode type. The related hexadecimal value can be found according to Barcode Types.
- The last two
XX Use hexadecimal notation, two characters are one unit, any shortage is filled with 0, and the length range is
0x0000-0xFFFF.
Example
It is necessary to hide the end position of Code 128 and set it to
100. According to Barcode Types, the hexadecimal value of Code 128 is01, and the hexadecimal value of 100 is64, then the Parameter Barcode content is:>!01080B0164.
Scan the “Barcode Type and End Position” Parameter Barcode
Barcode Type And End Position#
Set the symbology by scanning the Numeric Barcodes in pairs.
Example
Code 128 needs to be hidden. According to Barcode Types, the hexadecimal value of the barcode type of Code 128 is
01, so scan0and1respectively.
Set the end position by scanning the Numeric Barcodes in pairs.
Hexadecimal input is used here.
Example
Character position
11corresponds to0B; scan0andB.The
100position corresponds to64, scan6,4.
Scan the “OK” Parameter Barcode to complete the setup.
Sure#
Hide Any Length of Leading Data by Symbology#
This feature hides any number of unwanted leading characters for the selected symbology.
Hide Leading Data by Symbology#
* Disable# |
Enable# |
Set Leading-data Length by Symbology#
There are two ways to set the length. Method 1 requires the user to generate a QR code and is more flexible when configuring multiple values. Method 2 uses the Parameter Barcodes in this manual; scan them in the specified sequence.
The length format of hiding arbitrary length data at the end of the barcode according to the barcode type is: >!01080CXXXX.
XXXXSet variables.
- The first two
XX Indicates the barcode type. The related hexadecimal value can be found according to Barcode Types.
- The last two
XX Use hexadecimal notation, two characters are one unit, any shortage is filled with 0, and the length range is
0x0000-0xFFFF.
Example
It is necessary to hide the data of Code 128 header length
15. According to Barcode Types, the hexadecimal value of Code 128 is01, and the hexadecimal value of 15 is0F, then the Parameter Barcode content is:>!01080C010F.
Scan the “Barcode Type and Length” Parameter Barcode
Barcode Type And Length#
Set the symbology by scanning the Numeric Barcodes in pairs.
Example
Code 128 needs to be hidden. According to Barcode Types, the hexadecimal value of the barcode type of Code 128 is
01, so scan0and1respectively.
Set the length by scanning the Numeric Barcodes in pairs.
Hexadecimal input is used here.
Example
The length
11corresponds to0B, scan0,B.The length
100corresponds to64, scan6,4.
Scan the “OK” Parameter Barcode to complete the setup.
Sure#
Hide Any Length of Trailing Data by Symbology#
This feature hides any number of unwanted trailing characters for the selected symbology.
Hide Trailing Data by Symbology#
* Disable# |
Enable# |
Set Trailing-data Length by Symbology#
There are two ways to set the length. Method 1 requires the user to generate a QR code and is more flexible when configuring multiple values. Method 2 uses the Parameter Barcodes in this manual; scan them in the specified sequence.
The length format of hiding any length of data at the end of the barcode according to the barcode type is: >!01080DXXXX.
XXXXSet variables.
- The first two
XX Indicates the barcode type. The related hexadecimal value can be found according to Barcode Types.
- The last two
XX Use hexadecimal notation, two characters are one unit, any shortage is filled with 0, and the length range is
0x0000-0xFFFF.
Example
It is necessary to hide the data with tail length
12of Code 128. According to Barcode Types, the hexadecimal value of Code 128 is01, and the hexadecimal value of 12 is0C, then the Parameter Barcode content is:>!01080D010C.
Scan the “Barcode Type and Length” Parameter Barcode
Barcode Type And Length#
Set the symbology by scanning the Numeric Barcodes in pairs.
Example
Code 128 needs to be hidden. According to Barcode Types, the hexadecimal value of the barcode type of Code 128 is
01, so scan0and1respectively.
Set the length by scanning the Numeric Barcodes in pairs.
Hexadecimal input is used here.
Example
The length
11corresponds to0B, scan0,B.The length
100corresponds to64, scan6,4.
Scan the “OK” Parameter Barcode to complete the setup.
Sure#
Insert Custom Data#
This function can insert user-defined data at any position in the barcode data according to requirements.
Insert Custom Data Switch#
* Disable# |
Enable# |
Custom Data#
There are two methods for customizing data. The first method requires the user to generate a QR code, which tends to set up more users and is more flexible to use. The second method can scan the Parameter Barcode in this manual according to the steps.
Customized insertion data Parameter Barcode content format: >!010803XX.
XXSet variables using hexadecimal notation. Two characters are one unit. Any deficiencies are filled with 0s. They can be superimposed arbitrarily. A maximum of 20 digits of custom data are supported.
Example
You need to insert custom data A, check ASCII Code Comparison Table, the hexadecimal value is
41, then the Parameter Barcode content is:>!01080341.You need to insert custom data ABC, check ASCII Code Comparison Table, the hexadecimal value is
414243, then the Parameter Barcode content is:>!010803414243.
Scan the “custom data” Parameter Barcode
Custom Data#
Scan the Numeric Barcodes in pairs.
Example
If you need to insert custom data A, check ASCII Code Comparison Table. If the hexadecimal value is
41, scan4and1respectively.If you need to insert custom data ABC, check ASCII Code Comparison Table, the hexadecimal value is
414243, then scan4,1,4,2,4,3respectively
Scan the “OK” Parameter Barcode to complete the setup.
Sure#
Insertion Position#
There are two methods for setting the insertion position. Method 1 requires the user to generate a QR code and is more flexible when configuring multiple values. Method 2 uses the Parameter Barcodes in this manual; scan them in the specified sequence.
Insert position Parameter Barcode content format: >!00102EXX.
XXSet variable, decimal range
1-65535.
Example
If the insertion position is set to
11, the Parameter Barcode content is:>!00102E11.
Data Replacement#
This function can replace the data in the original string with any data according to requirements.
Data Replacement Switch#
* Disable# |
Enable# |
Replaced Data Settings#
There are two methods for setting the replaced data. Method 1 requires the user to generate a QR code and is more flexible when configuring multiple values. Method 2 uses the Parameter Barcodes in this manual; scan them in the specified sequence.
The content format of the replaced data Parameter Barcode: >!010804XX.
XXSet variables in hexadecimal notation. Two characters are one unit. Any deficiencies are filled with 0s. They can be superimposed arbitrarily. A maximum of 20 digits are supported.
Example
Replaced data A, check ASCII Code Comparison Table, the hexadecimal value is
41, then the Parameter Barcode content is:>!01080441.For the replaced data ABC, check ASCII Code Comparison Table, the hexadecimal value is
414243, then the Parameter Barcode content is:>!010804414243.
Scan the “replaced data” Parameter Barcode
Data To Be Replaced#
Scan the Numeric Barcodes in pairs.
Example
For the replaced data A, check ASCII Code Comparison Table, the hexadecimal value is
41, then scan4and1respectively.To wrap the replaced data, check ASCII Code Comparison Table. If the hexadecimal value is
0A, scan0andArespectively.
Scan the “OK” Parameter Barcode to complete the setup.
Sure#
Replace Data Settings#
There are two methods for replacing data settings. Method 1 requires the user to generate a QR code and is more flexible when configuring multiple values. Method 2 uses the Parameter Barcodes in this manual; scan them in the specified sequence.
Replacement data Parameter Barcode content format: >!010805XX.
XXSet variables in hexadecimal notation. Two characters are one unit. Any deficiencies are filled with 0s. They can be superimposed arbitrarily. A maximum of 20 digits are supported.
Example
Data A replaces the original data, check ASCII Code Comparison Table, the hexadecimal value is
41, then the Parameter Barcode content is:>!01080541.Data ABC replaces the original data, check ASCII Code Comparison Table, the hexadecimal value is
414243, then the Parameter Barcode content is:>!010805414243.
Scan the “Replace Data” Parameter Barcode
Replace Data#
Scan the Numeric Barcodes in pairs.
Example
Data A replaces the original data, check ASCII Code Comparison Table, the hexadecimal value is
41, then scan4and1respectivelyTo replace the original data with newline data, check ASCII Code Comparison Table. If the hexadecimal value is
0A, scan0andArespectively.
Scan the “OK” Parameter Barcode to complete the setup.
Sure#
Line Feed And Carriage Return#
Line feed (\n) and carriage return line feed (\r\n) are both converted to carriage return (\r).
* Disable# |
Enable# |
URL Switch#
To prevent barcodes with URL information from being mistakenly scanned when scanning product barcodes, or in some other special applications, this function can disable the recognition of barcodes with URL information as needed.
* Enable URL Code# |
Disable URL Codes# |
Invoicing Function#
In order to use this module normally in the invoicing system, users can convert and output the invoice code format by scanning the following Parameter Barcode.
Note
This function supports Alipay QR code invoicing, but does not support WeChat QR code invoicing.
Invoicing Function Switch#
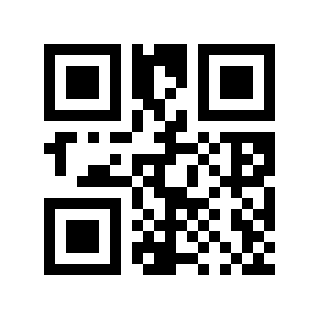
* Disable# |
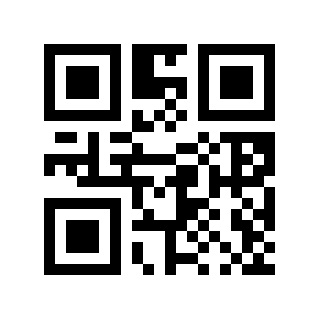
Enable# |
Invoice type#
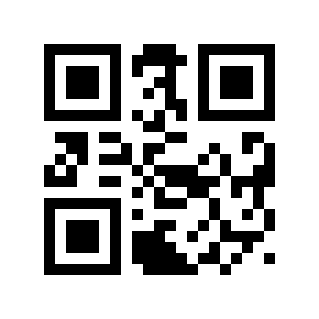
* Special Ticket# |
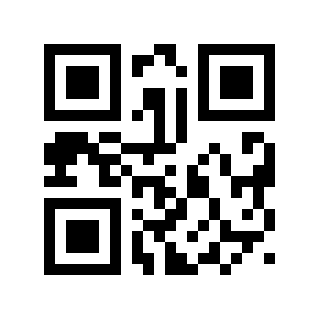
Popular Vote# |
GS1 rules enabled#
Enable GS1 rules and enclose AI segments in parentheses.
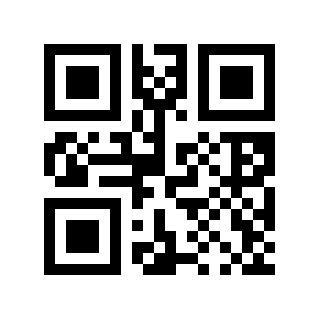
* Disable# |
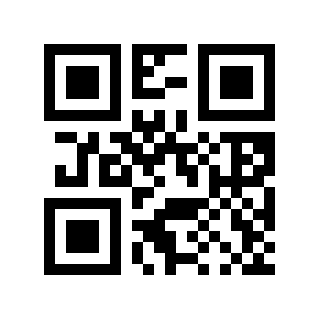
Enable# |